So you’ve built an amazing Moodle course and it’s time to think about enrolling and managing your users. You may have heard of groups, groupings and cohorts, but do you know when to leverage each? Let’s take the mental gymnastics out of when to use each one.
When it comes to enrolling users into your course, you have a few choices, including manually enrolling each user, uploading a .csv file or even setting up self-enrolment. There are pros and cons to each method, so it is worth taking a moment to consider the options and pick one that best suits your needs.
An option you may not have considered, which can work well especially for smaller Moodle sites, is cohorts. Think of cohorts as site wide groups. Cohorts are usually managed by the Moodle administrator or a user with a Manager role.
Let’s say you had 200 learners and each learner will belong to a basic, intermediate or advanced level. Basic learners will have access to only 4 basic courses. Intermediate learners will have access to 3 intermediate courses, plus access to all the basic courses. The advanced learners will have access to 2 advanced courses, plus access to all intermediate and all basic courses.
You can manage their enrolments using cohorts. Simply set up a Basic cohort, an Intermediate cohort and an Advanced cohort. Next you add your learners into their respective cohort.
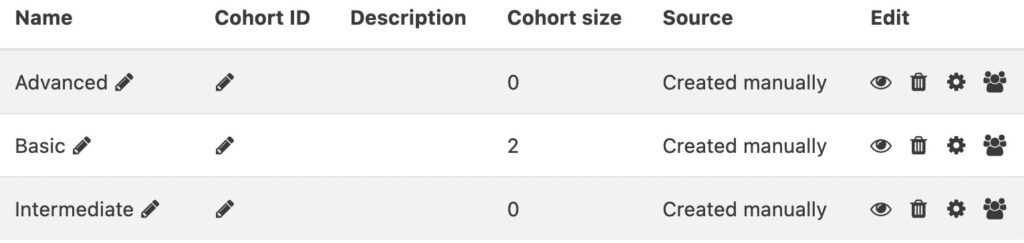
Then all you need to do is add a cohort sync enrolment method to each course. For example you will add the Basic cohort as a cohort sync to each Basic course and as a result all your Basic learners will automatically have access to these courses.
Using cohorts and cohort sync enrolment method means you can centrally manage your learners and their course enrolments will be automatically taken care of. You just add learners to or remove learners from each cohort to control which courses each learner can access.
No matter what enrolment method you have chosen, once your learners are in your course, there are many benefits to setting up and using groups in your courses.
Groups can help you to easily perform tasks such as target who you send a message to, or select who you want to grade, or control which resources learners will access. Remember that groups are unique to each course, which means you need to set up each group separately in each course. You and your learners can belong to as many groups as you like in each course, which gives you tremendous flexibility when it comes to access, communication and collaboration.
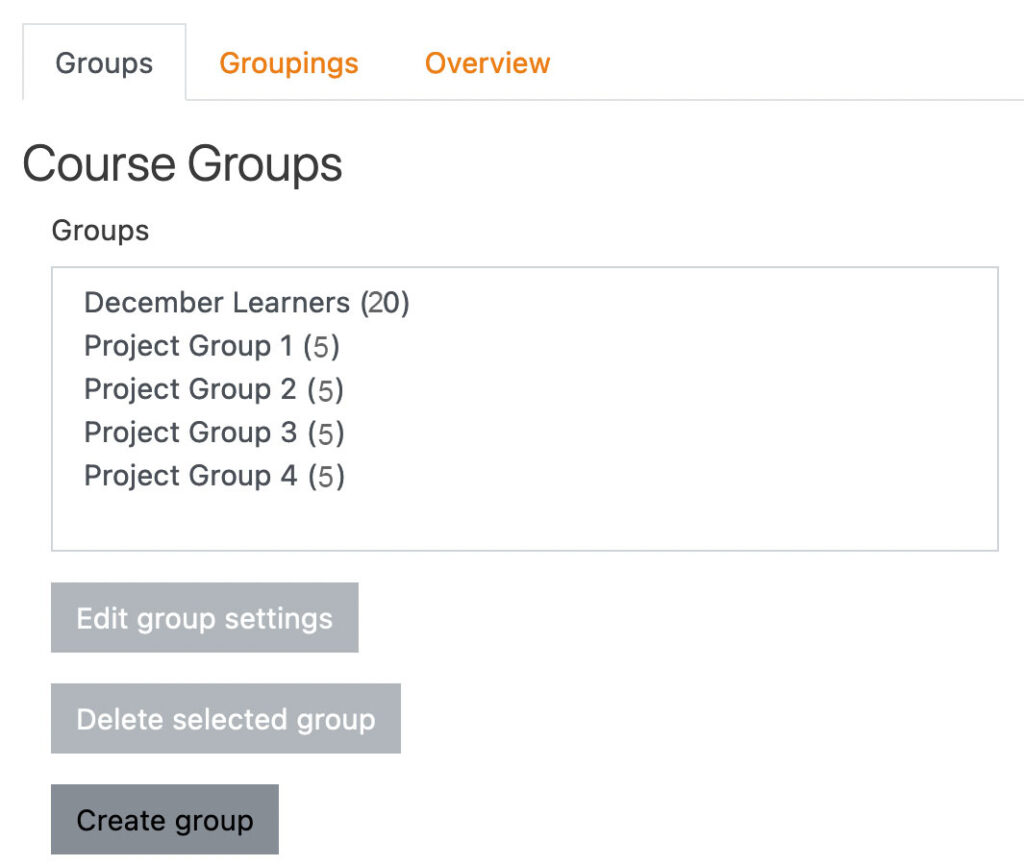
For instance, you might set up a group for learners who joined the course this month. Let’s say there are 20 learners in that group and you want to have this month’s learners collaborate on a project with 5 learners in each group. You can set up 4 additional groups and add your learners to these new groups. So now each learner belongs to two groups, the original group for the month they joined and also their project group.
You can now allocate activities and resources to each new group. For instance you might set up a forum where each group can discuss their project. You could also use groups to allocate a wiki to each group so they can collaborate. Remember to also allow group messaging when you set up the group to maximise communication opportunities.
Something to consider when you have groups in your course is what setting you will apply to each activity. You will have 3 options to choose from…visible groups, separate groups and no groups. Separate groups means learners cannot see or access contributions from other groups. Visible groups allows learners to see and access contributions from other groups and of course no groups means all learners are considered to be in one big group. You have the choice of setting this for the whole course and force the group mode for every activity, or you can choose the best setting for each activity.
Then, there are groupings! Groupings are a great way to tweak the settings in your course and then control access by adding a group to a grouping. These are super handy when it comes to giving groups with common needs access to sections or activities.
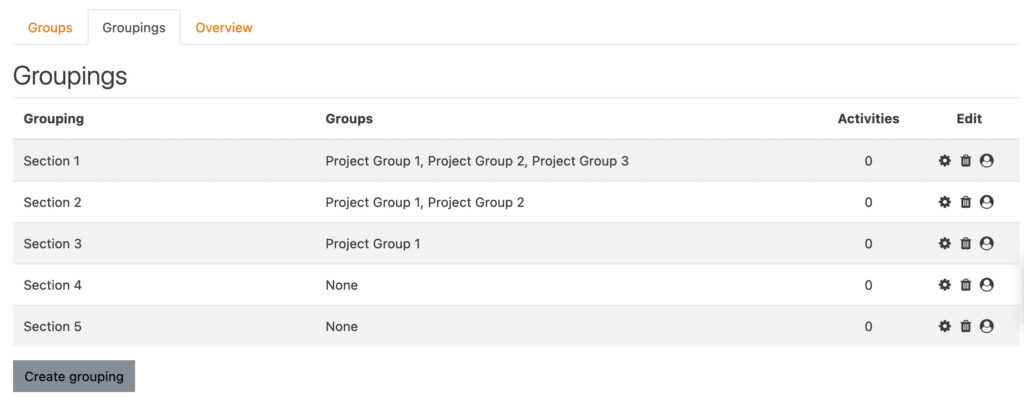
So let’s say you have set up your course with 10 sections and you have 4 groups working through the course. Each group started at a different time and has a different timetable. You would like to control when each group can access each section irrespective of how many activities each student has completed.
A nice simple way to do this, is to set up a grouping for each section. Then add a restriction to each section saying learners need to belong to that grouping. So now when you are ready for a group to progress to a section, all you do is add their group to the section grouping.
You can use this same method to give multiple groups access to a file within a section. In this case you might have two versions of a file and you might have 6 groups. If you would like to control which version each group sees a simple way to do this is to set up a grouping for each file and then you can just add groups along the way to whichever version grouping you prefer.
So there you have it, simple ways to leverage groups, groupings and cohorts. These features can streamline your course set up and give you control over how learners access and interact within your Moodle courses.